
Administrative Posts
Business Process Overview
Step 1:
- The necessary changes to the Administrative Post have been defined.
- The effective date for the Administrative Post maintenance has been established.
Step 2:
- The department initiates an electronic document (E-Doc) to maintain the Administrative Post.
Step 3:
- The E-Doc will route electronically for approval.
- The Central Office will provide final approval and save to HRMS.
Instructions
1. In One.IU navigate to the eDocs tab in the HRMS Portal, click Admin Posts.
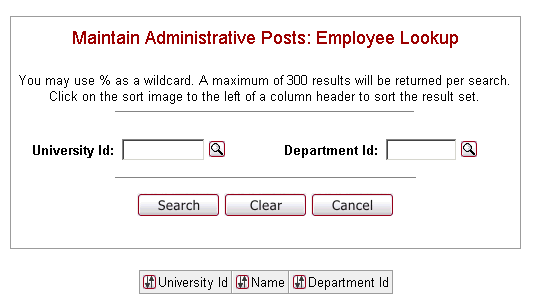
2. Enter the University Id and/or Department Id.
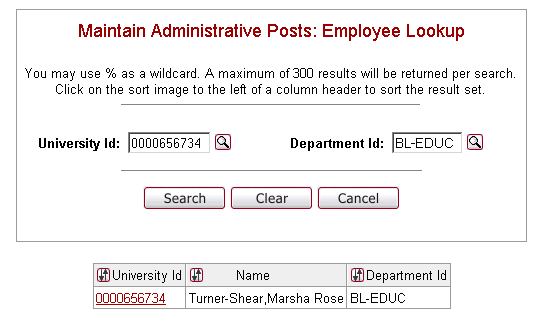
3. Select the University ID and the Administrative Post page will be displayed.
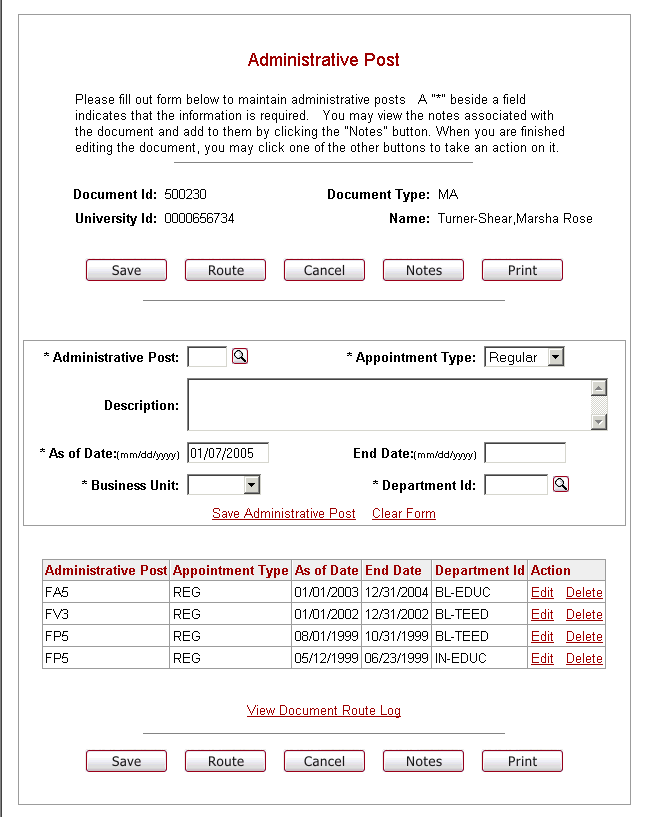
4. Your Administrative Posts (title) will be returned to the bottom of the page. Click Edit on the Administrative Post that requires a change (in the example below, FA5).
Your Administrative Post (title) will populate the top portion of the page to allow entering the correct information.
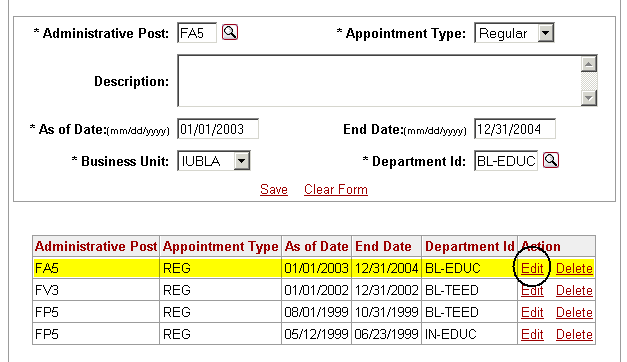
5. Enter your changes (in the example below, As of and End Dates). Click Save.
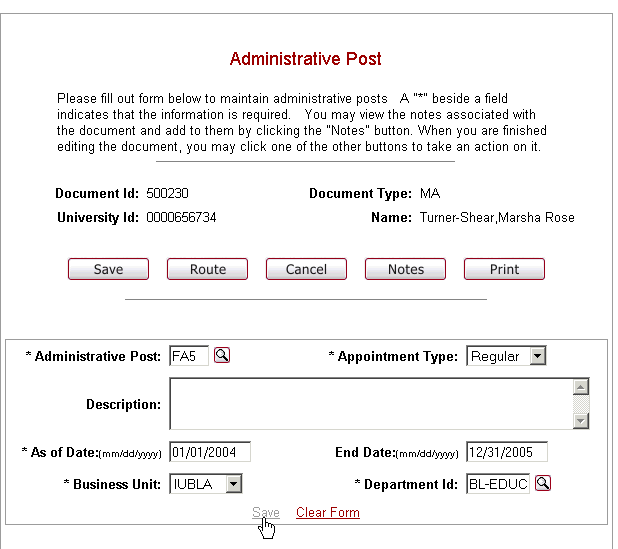
6. The changes will be reflected in the Administrative Post listing.

7. Click on the appropriate action button(s) below.

SAVE = this action Saves to your Action List in order for you to retrieve it at a later time to complete it.
ROUTE = select when you have completed the E-Doc and are ready to automatically route the document where it will be approved and eventually saved to PeopleSoft.
CANCEL = cancels the entire E-Doc. It will be necessary to begin over.
NOTES = initiators and approvers can add notes to the electronic document as it is being routed through the approval process. Notes should be used for providing details about the transaction being routed. Notes are only available to initiators and users who are part of the routing process. They are not saved in PeopleSoft but are stored within the E-doc database.
PRINT = allows the initiator and any document approver to print the doc.
The File download box should appear. It will give you the option to either open the file or save it to your Desktop. You should always open the file, unless you get an error indicating that the file will not open, then you must save it.
When you open the file, the completed document should open in Adobe Acrobat.
If it is necessary to save the file, you will need to go to your Desktop and double-click on the Acrobat file icon for the E-Doc file that you just completed. The E-Doc can then be printed; however, after it is printed, you should delete the file from your Desktop. The E-Doc may contain personal information that should not be stored on your computer.
To print the E-Doc, click on the Print icon in the Adobe Reader Toolbar.
8. Click Route to send the E-Doc to be approved and the following screen will appear. (You may have done this in the previous step.)
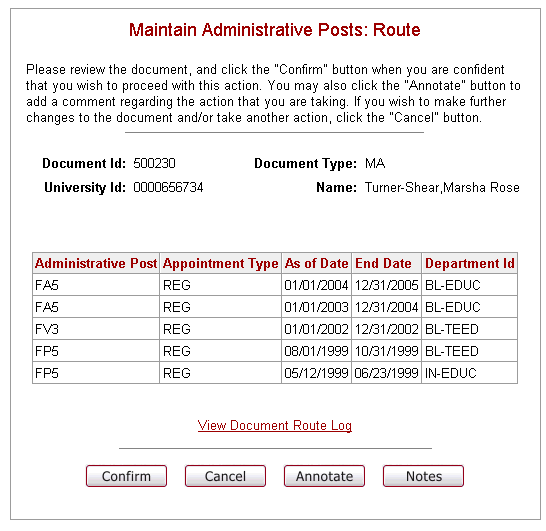
Annotate - Annotate should be used for information related to processing of the E-doc. This field is helpful for approvers to prioritize activities, especially for those with large action lists. Annotations are available for viewing in the route log that is accessible during document search and on the action list. Due to the fact that route logs are available to all users through the document search, confidential information should not be entered in this field. Some examples of phrases that may appear in the annotation:
- Please process immediately
- Urgent
- Disapproved
9. Click Confirm and you will be notified that you have routed the E-Doc successfully.
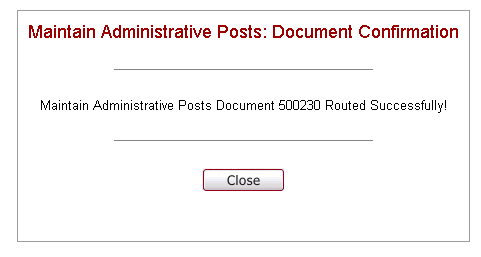
10. Click Close to close the Document Confirmation window.
Review the Workflow Overview.
Once the document is routed, you can perform a Document Search to see where the E-Doc currently is.