
Renew Academic Contract
Update coming soon.
- An employee’s contract has expired, and the employee will continue to serve, therefore, the contract must be renewed.
- The departmental user initiates an electronic document (E-Doc) to begin the data change process.
- The E-Doc is routed for approval.
- The approvers check for pre-conditions then forward the E-doc to central office.
- As final approver, the central Office reviews the E-doc, if approved; the information is saved to the HRMS database.
Key Information
The following is key information you will need to know to complete the process:
- Effective date of the Contract Renewal.
- Contract Type.
- Contract Amount.
- If at any time you need to cancel the E-doc you are processing, DO NOT click the “X” on the upper right corner of the document. Clicking the “X” will create subject locking on the employee and/or position id. Always use the button to cancel an E-doc.
- Do not use the browser back arrow to move to a previous page, this will create subject locking on the employee and/or position ID.
Instructions
1. In One.IU navigate to the eDocs tab in the HRMS Portal, click Renew Contract.
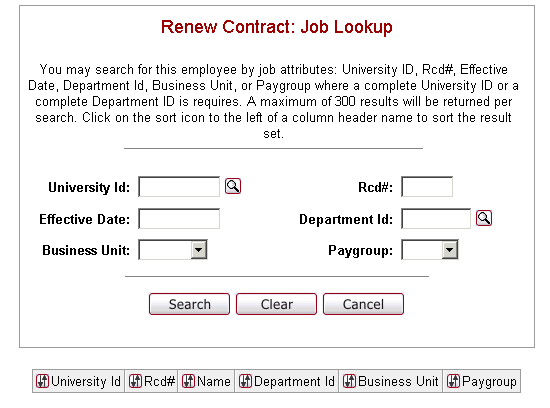
2. Enter the number in the ID field or any other criteria that you have, click Search, and any record that met the search criteria will appear.
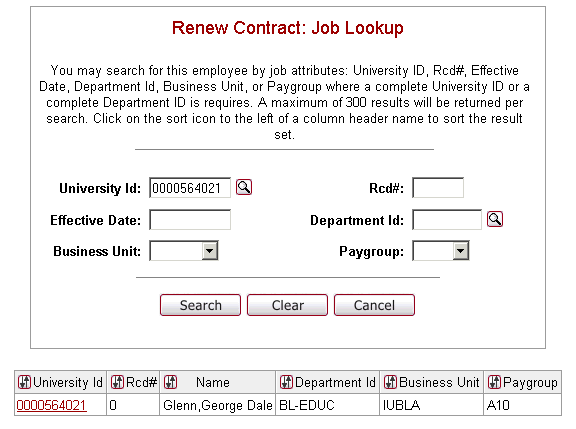
3. Click on the record and the following screen will appear.

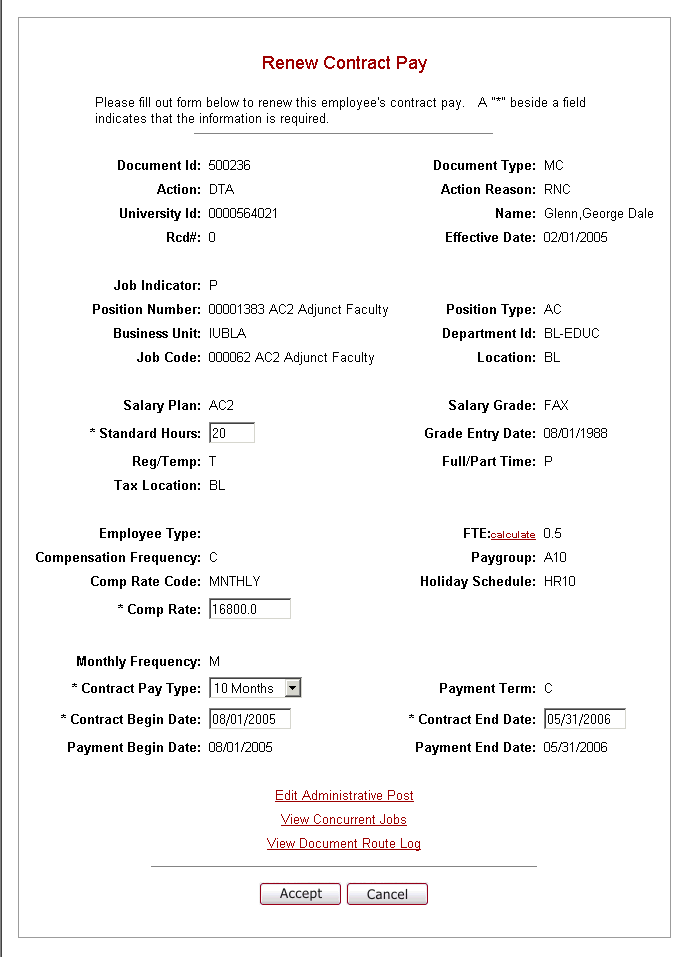
4. Enter the Effective Date of the renewed contract (refer to standard dates for academic 10 pay contracts, i.e., 8/1/$$ and 1/1/$$). Click Accept and you will move to the Renew Contract Pay page.
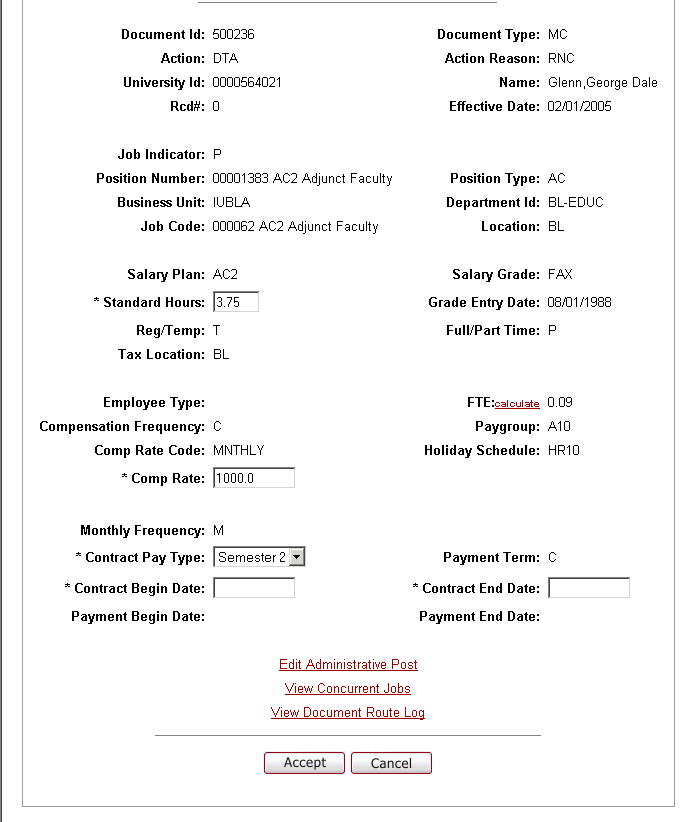
5. If the default standard hours will not be what the employee will be working, you will need to change the standard hours to reflect the appropriate FTE, and click the Calc FTE.
- Enter the Comp Rate – ENTIRE CONTRACT AMOUNT.
Contract Information
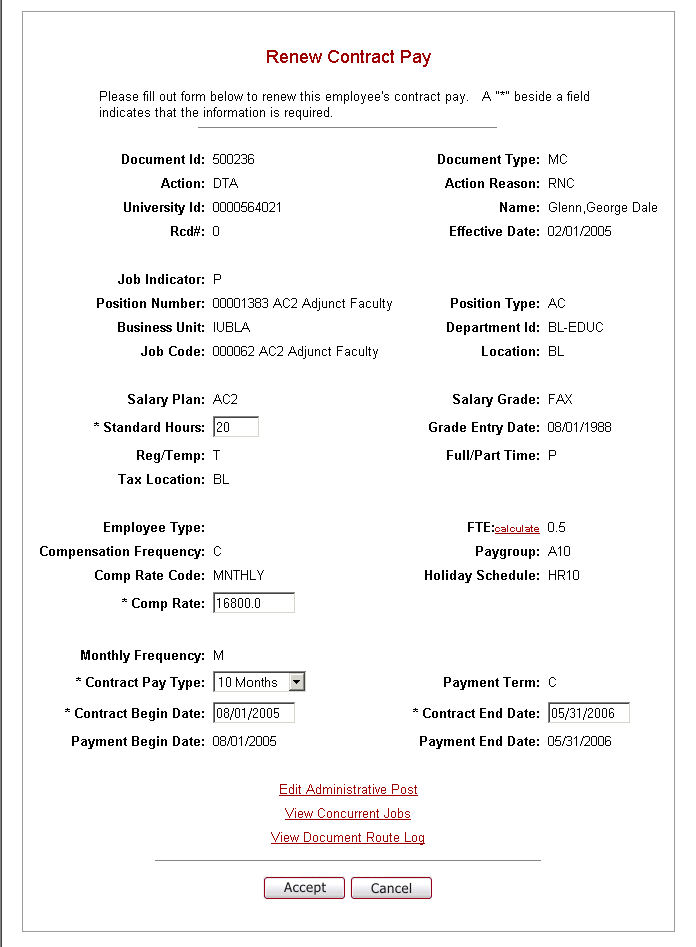
- From the dropdown select the Contract Pay Type:
Academic Contract – Semester 1 (use for 10 month only)
Academic Contract – Semester 2 (use for 10 month only)
Academic Contract – 10 mos. (use for academic year)
Academic Contract – 12 mos. (use for monthly appointments or full 12 month appointments
- Contract Begin/End Dates - Enter the Contract Begin Date as appropriate.
If Semester 1: Begin: (08/01/yyyy) End: 12/31/yyyy
If Semester 2: Begin: (01/01/yyyy) End: 05/31/yyyy
If Academic Year: Begin: (08/01/yyyy) End: 05/31/yyyy
If Full year: Begin: (08/01/yyyy) End: mm/dd/yyyy
Annual or partial year not following a semester or academic year.
- Complete the fields with supplied information. The fields with an * are required fields. See completed example below.
6. Click Edit Administrative Post. (This will only apply to the AC2 Salary Plan employees). You will move to the Administrative Post.
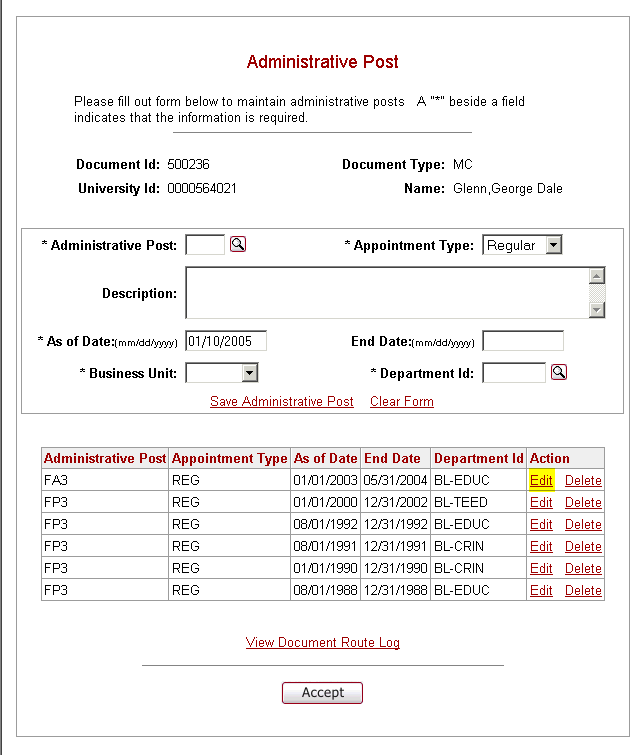
7. Click Edit on the Administrative Post. This will populate your Administrative Post (title) to the top of the page and allow you to enter a new end date.
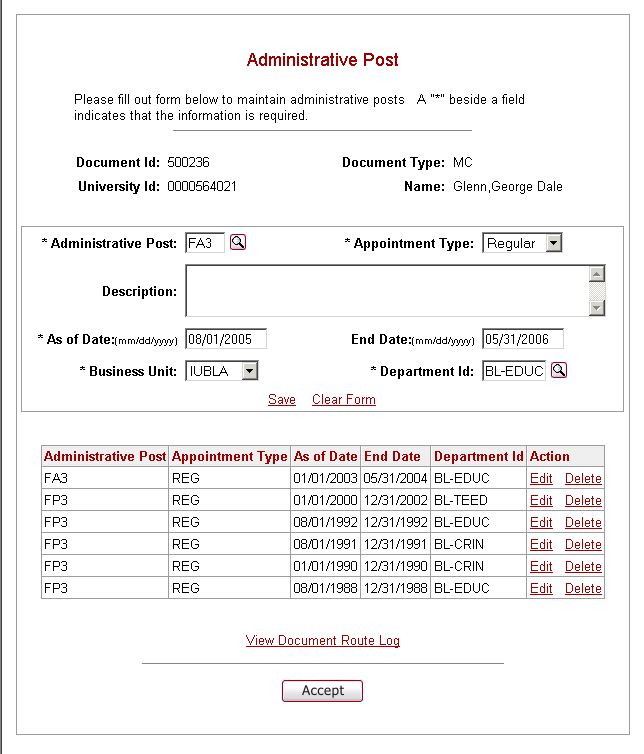
8. After the End Date has been corrected, click Accept.
9. After reviewing the Job Information Page, click Accept. You will move to the Renew Contract Job Funding Page.
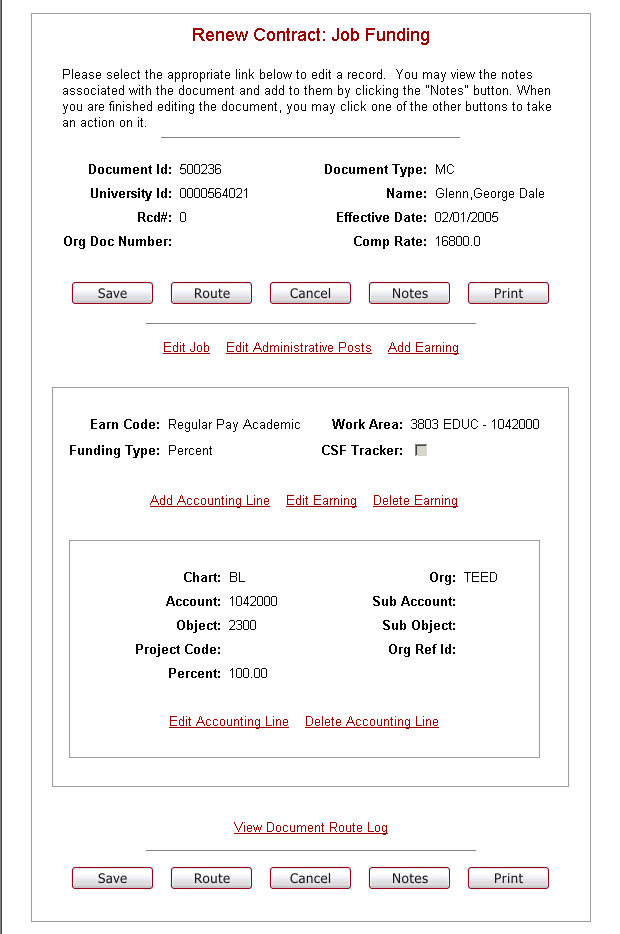
10. Review Job Funding, and if correct, click on the appropriate action button(s) below. If not, click Edit Earning or Edit Accounting Line and correct as needed.
- The Work Area identifies the payroll voucher flow, verify that it will remain the same.
- The Account identified the account number that will be charged for the renewed contract, verify that it is accurate.

SAVE = this action Saves to your Action List in order for you to retrieve it at a later time to complete it.
ROUTE = select when you have completed the E-Doc and are ready to automatically route the document where it will be approved and eventually saved to PeopleSoft.
CANCEL = cancels the entire E-Doc. It will be necessary to begin over.
NOTES = initiators and approvers can add notes to the electronic document as it is being routed through the approval process. Notes should be used for providing details about the transaction being routed. Notes are only available to initiators and users who are part of the routing process. They are not saved in PeopleSoft but are stored within the E-doc database.
PRINT = allows the initiator and any document approver to print the doc.
The File download box should appear. It will give you the option to either open the file or save it to your Desktop. You should always open the file, unless you get an error indicating that the file will not open, then you must save it.
When you open the file, the completed document should open in Adobe Acrobat.
If it is necessary to save the file, you will need to go to your Desktop and double-click on the Acrobat file icon for the E-Doc file that you just completed. The E-Doc can then be printed; however, after it is printed, you should delete the file from your Desktop. The E-Doc may contain personal information that should not be stored on your computer.
To print the E-Doc, click on the Print icon in the Adobe Reader Toolbar.
11. Click Route to send the E-Doc to be approved and the following screen will appear. (You may have done this in the previous step.)
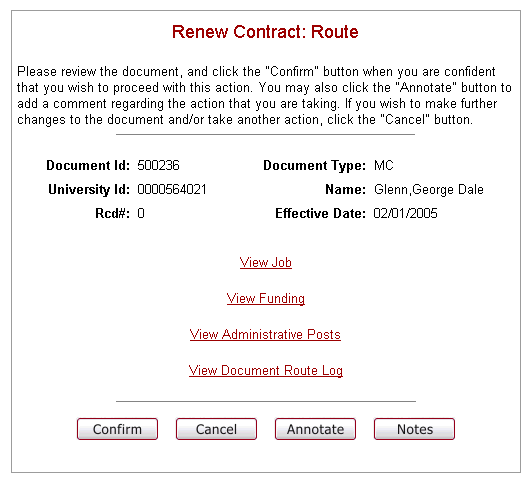
Annotate - Annotate should be used for information related to processing of the E-doc. This field is helpful for approvers to prioritize activities, especially for those with large action lists. Annotations are available for viewing in the route log that is accessible during document search and on the action list. Due to the fact that route logs are available to all users through the document search, confidential information should not be entered in this field. Some examples of phrases that may appear in the annotation:
- Please process immediately
- Urgent
- Disapproved
12. Click Confirm and you will be notified that you have routed the E-Doc successfully.
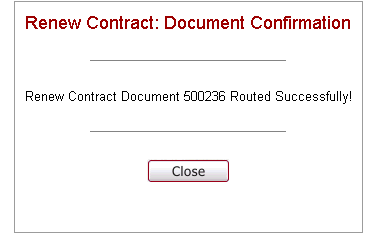
13. Click Close to close the Document Confirmation window.
Review the Workflow Overview.
Once the document is routed, you can perform a Document Search to see where the E-Doc currently is.
NOTE: A note will automatically be attached when the document is routed showing the current PeopleSoft value and what the value has changed to in the E-doc. This happens after the document is routed.