
Hire Graduate Workstudy Academic
Update coming soon.
The following is key information you should know about appointing a Graduate Work Study:
- To enter changes or updates to the student Bio/Demo information you will need to complete a maintain person eDoc.
- Academic Contract – Semester 1 (use for 10 month only)
- Academic Contract – Semester 2 (use for 10 month only)
- Academic Contract – 10 mos. (use for academic year)
- Contract Begin/End Dates - Enter the Contract Begin Date as appropriate.
- WSG
Sem. 1 08/01/00 - 12/31/00
Sem. 2 01/01/00 - 05/00/00 (day after final grades are due)
- If at any time you need to cancel the eDoc you are processing, DO NOT click the “X” on the upper right corner of the document. Clicking the “X” will create subject locking on the employee and/or position id. Always use the button to cancel an eDoc.
- Do not use the browser back arrow to move to a previous page, this will create subject locking on the employee and/or position id.
Instructions
1. In One.IU navigate to the eDocs tab in the HRMS Portal, click Hire Employee.
Based on the employee information that you have, select the ID type from the drop down menu and click on it. If this is a new person to the university, you must complete the Add Person E-Doc.
Campus ID - a number assigned to students upon admission - either their national ID or a selected number
National ID - Social Security number
University ID - PeopleSoft generated 10-digit number
Name & Birthdate - first and last name of person and birthdate
When completing a Graduate Work Study hire it is critical that you search by the following criteria to avoid processing a hire on an incorrect student:

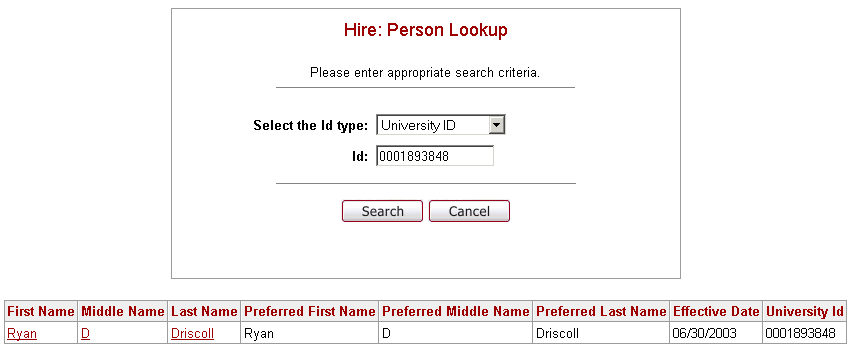
2. Enter the number in the ID field, click Search, and any record that met the search criteria will appear.
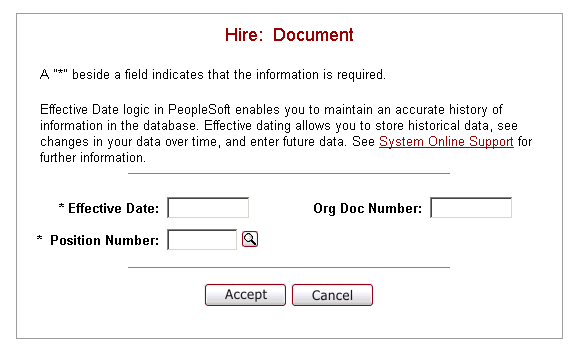
3. Click on the record and the following screen will appear. Enter the Effective Date of the hire (the first day employed). Enter the position number the person is being hired into (using the lookup as needed - see example below), and click Accept.
 /p>
/p>
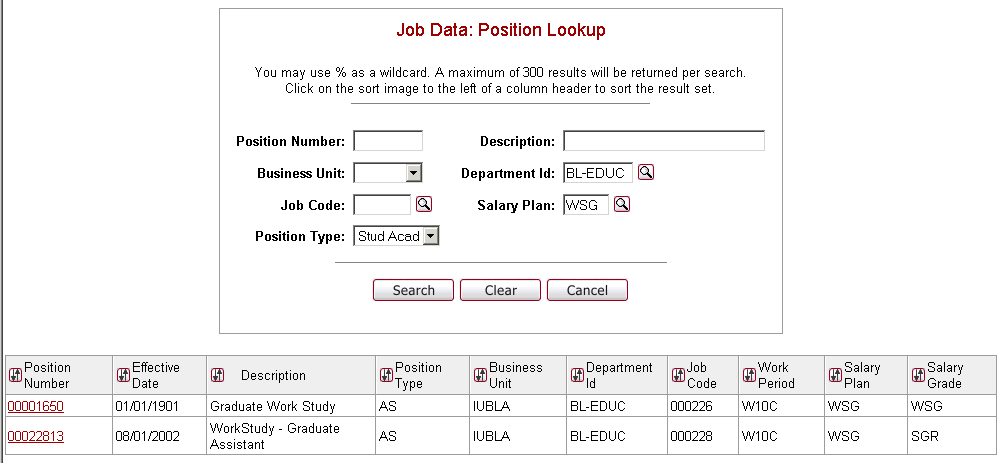
4. The following is an example of a Position Lookup screen. Enter as much information as you have to narrow your search. After entering the information, select Search and a list of positions will be displayed.
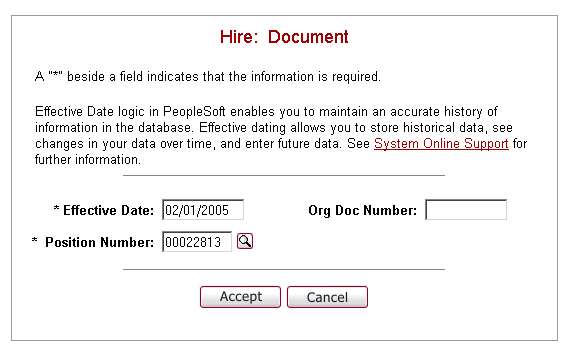
5. Click on the correct position number and it will automatically populate the previous position screen. Review the Work Periods selection to retrieve the appropriate position.
Enter the effective date.
NOTE: If the validation check verifies that there is no Gender or Ethnic Group for the person you are attempting to hire, the following message will appear.
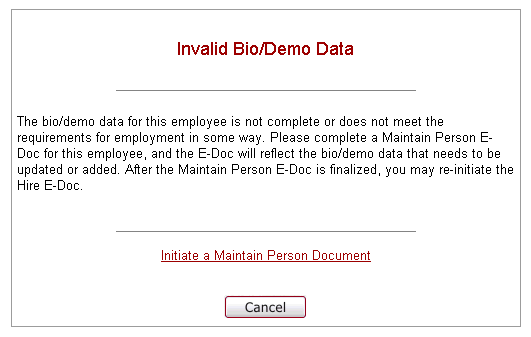
Go here for instructions: Bio/Demo Validation for Hires
If there is no message, proceed with step 7.
6. Click on the Accept and the Action Reason screen will appear. This is an AC3 employee which will process through contract pay, therefore the contract employee box will default checked.
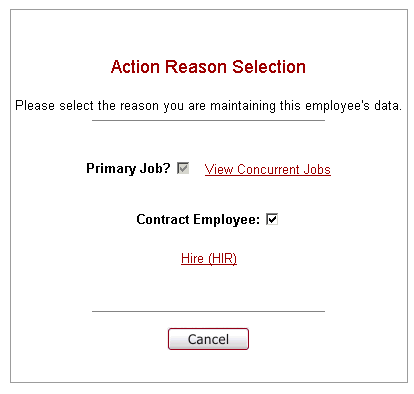
7. Select Hire (HIR) and the Job screen follows.
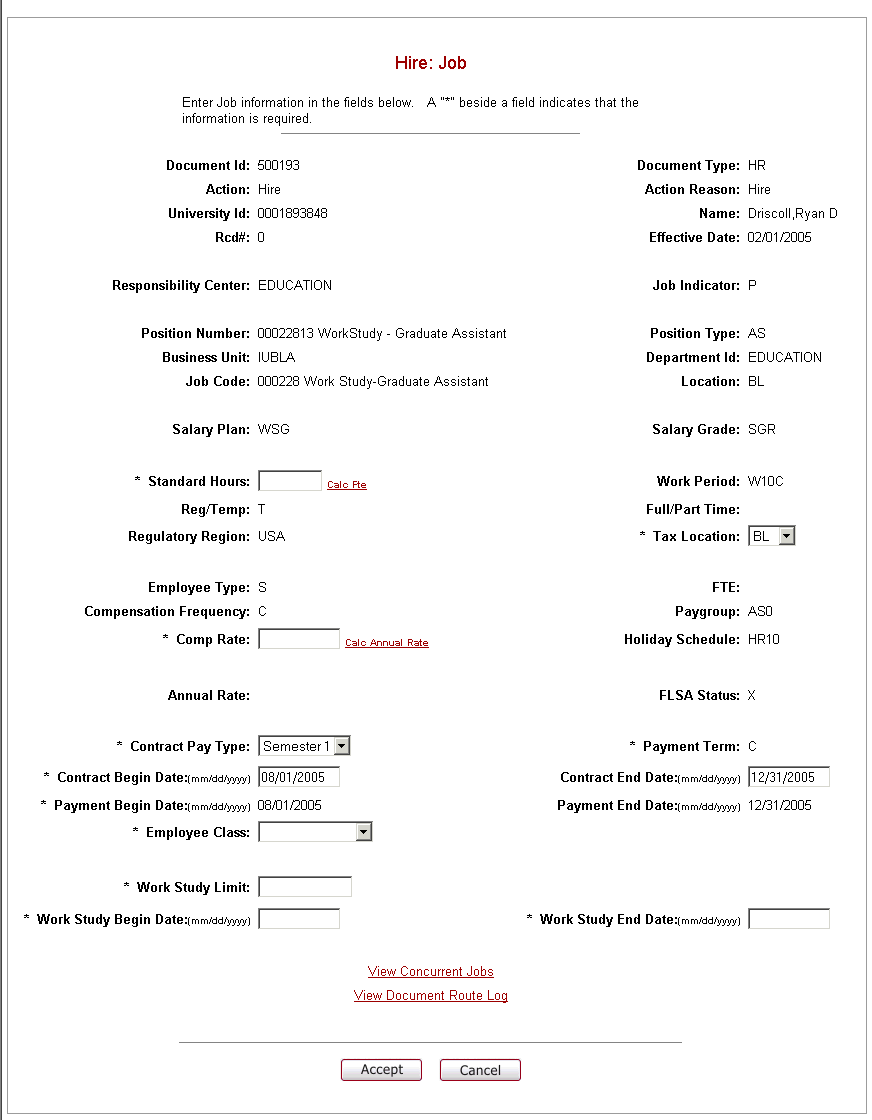
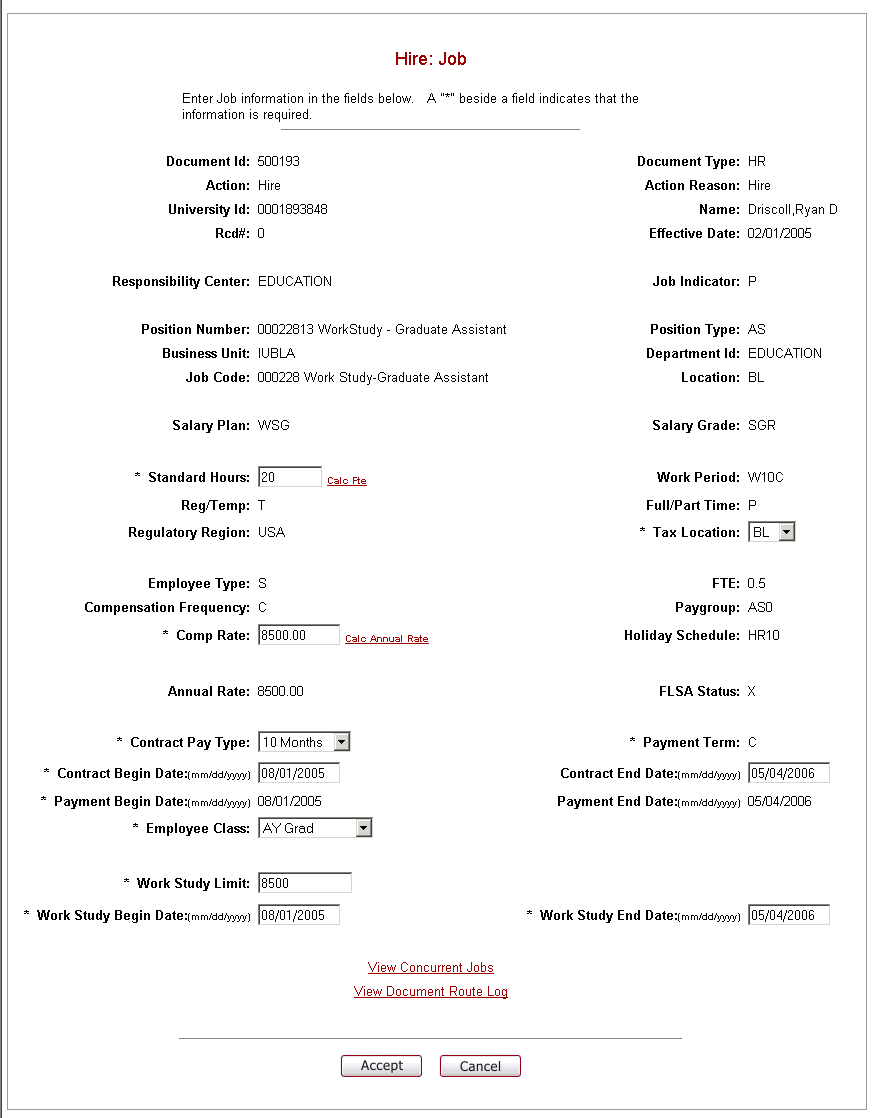
8. Complete the required fields (see completed example below).
- Enter the standard hours to reflect the appropriate FTE. Click on Calc Fte to the right of the box.
- Contract Information
Enter the Comp Rate which will be the ENTIRE contract amount.
From the dropdown you will select the Contract Pay Type:
- Academic Contract – Semester 1 (use for 10 month only)
- Academic Contract – Semester 2 (use for 10 month only)
- Academic Contract – 10 mos. (use for academic year)
- c. You
will enter the Contract Begin Date and the Contract End Date.
- If Semester 1: Begin: (08/01/yyyy) End: 12/31/yyyy
- If Semester 2: Begin: (01/01/yyyy) End: 05/00/yyyy (day after final grades are due)
- If Academic Year: Begin: (08/01/yyyy) End: 05/00/yyyy (day after final grades are due)
- From the Drop Down select the Employee Class. For the majority of appointments you will select AY GRAD.
- Work Study Limit entered must be the same $ amount as the Comp. Rate.
- Work Study Begin and End Dates entered must be the same dates as the Contract Begin and End Dates.
9. Click Accept and you will move to the Hire Job Funding Page.
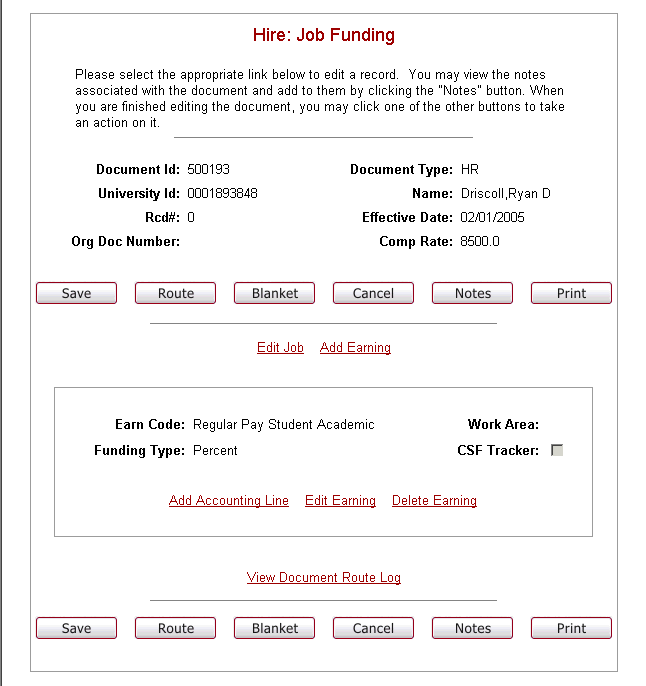
10. Add the Work Area by clicking Edit Earning. The Work Area identifies the payroll voucher flow.

11. Enter the number or use the lookup as needed (see example below).
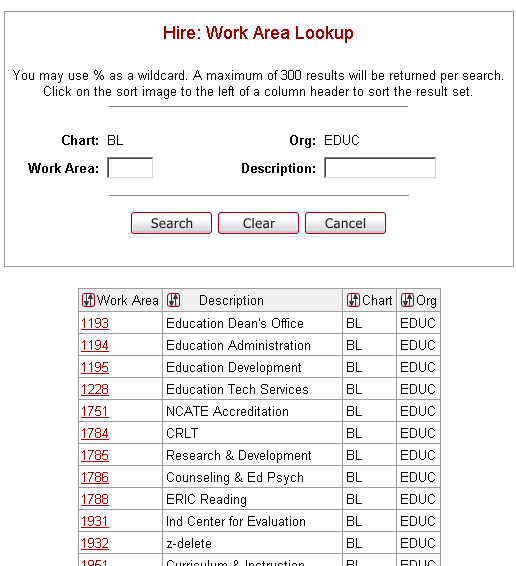
Select the desired Work Area number and the field will be populated.
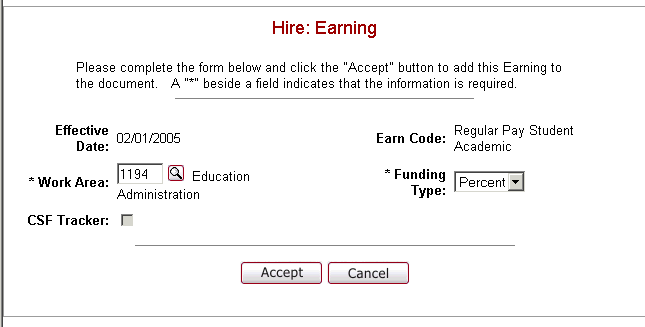
12. Funding Type will default in as percent. This position will not run through budget construction, therefore CSF Tracker will not be checked.
When completed, Select Accept and you will return to the Job Funding page with the Work Area completed.
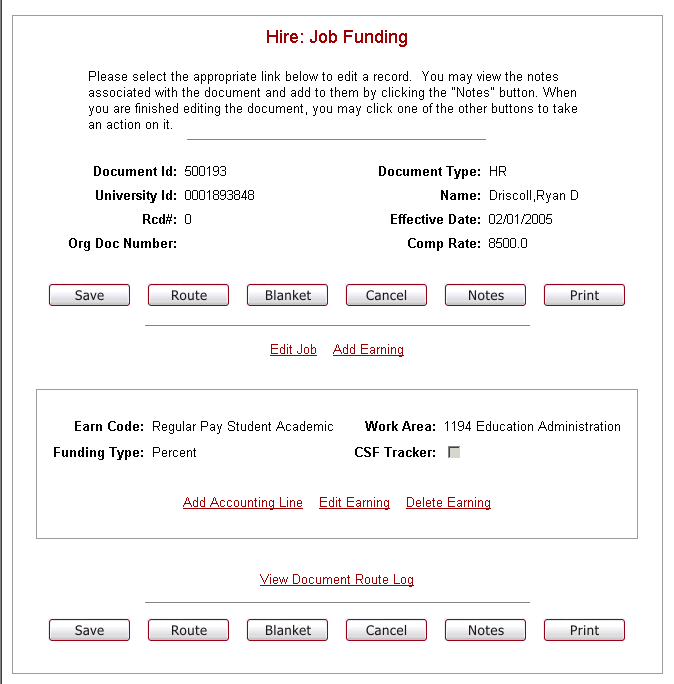
13. Click Add Accounting Line and the Hire: Accounting Line screen will appear.
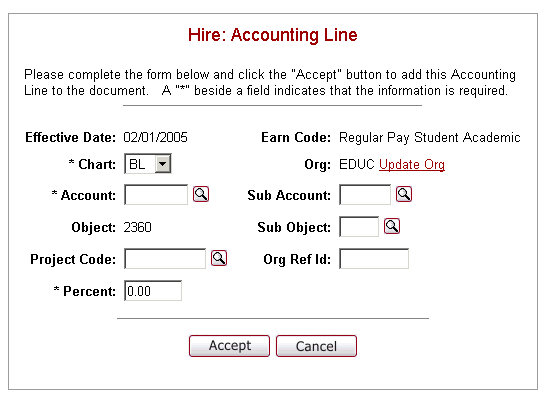
14. Complete the required fields.
- The Chart will default BL. If you need to make a different selection use the drop down.
- Insert the Account, or select from the lookup icon .
- If you have a Sub Account you can enter it, or click on the lookup icon to locate the Sub Account.
If you enter a Sub Account, you will also enter the Sub Object, or click on the lookup icon to locate the Sub Object code.
- The Project Code is an optional accounting key field that allows you to track expenses even if they are entered on a different campus, org, or account. If you know the Project Code you enter it or click on the lookup icon to locate the Project Code.
- Enter the Percent of the salary that is going to be charged to this account, i.e., job is 20 standard hours paid from one account would reflect 100% of earnings to be charged to this account.
15. When the Accounting Information is correct, click Accept and you will see the Job Funding page completed.
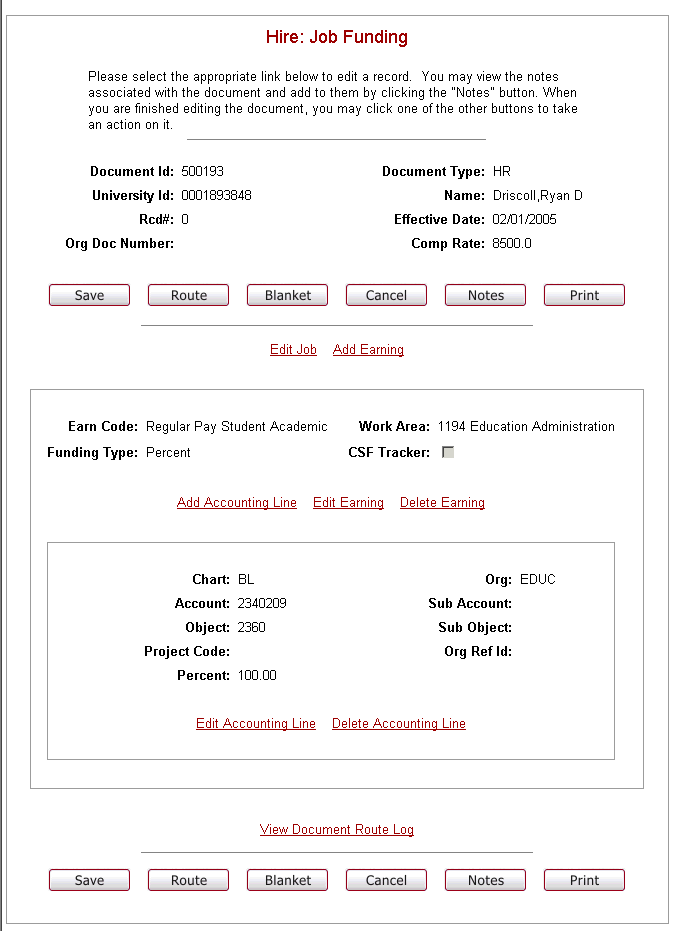
If you will be using multiple accounts, click Add Accounting Line and repeat the previous instructions. The total percentage of all accounts combined must equal 100%.
16. Review Job Funding, and if correct, click on the appropriate action button(s) below. If not, click Edit Earning or Edit Accounting Line and correct as needed.

SAVE = this action Saves to your Action List in order for you to retrieve it at a later time to complete it.
ROUTE = select when you have completed the E-Doc and are ready to automatically route the document where it will be approved and eventually saved to PeopleSoft.
CANCEL = cancels the entire E-Doc. It will be necessary to begin over.
NOTES = initiators and approvers can add notes to the electronic document as it is being routed through the approval process. Notes should be used for providing details about the transaction being routed. Notes are only available to initiators and users who are part of the routing process. They are not saved in PeopleSoft but are stored within the E-doc database.
PRINT = allows the initiator and any document approver to print the doc.
The File download box should appear. It will give you the option to either open the file or save it to your Desktop. You should always open the file, unless you get an error indicating that the file will not open, then you must save it.
When you open the file, the completed document should open in Adobe Acrobat.
If it is necessary to save the file, you will need to go to your Desktop and double-click on the Acrobat file icon for the E-Doc file that you just completed. The E-Doc can then be printed; however, after it is printed, you should delete the file from your Desktop. The E-Doc may contain personal information that should not be stored on your computer.
To print the E-Doc, click on the Print icon in the Adobe Reader Toolbar.
17. Click Route to send the E-Doc to be approved and the following screen will appear. (You may have done this in the previous step.)
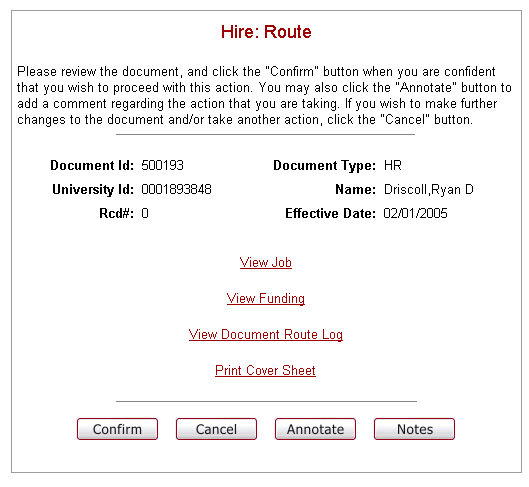
Annotate - Annotate should be used for information related to processing of the E-doc. This field is helpful for approvers to prioritize activities, especially for those with large action lists. Annotations are available for viewing in the route log that is accessible during document search and on the action list. Due to the fact that route logs are available to all users through the document search, confidential information should not be entered in this field. Some examples of phrases that may appear in the annotation:
- Please process immediately
- Urgent
- Disapproved
18. Click Print Cover Sheet and check all of the pertinent documents that you will be sending to the central office. Print this document (File, Print on your browser, or use the Print icon). Send the cover sheet and documents to the address indicated on the Cover Sheet. Once you have printed the cover sheet, click the X on your browser and it will return you to the Document Confirmation page.
19. Click Confirm and you will be notified that you have routed the E-Doc successfully.
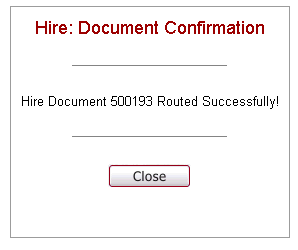
20. Click Close to close the Document Confirmation window.
Review the Workflow Overview.
Once the document is routed, you can perform a Document Search to see where the E-Doc currently is.
NOTE: A note will automatically be attached when the document is routed showing the current PeopleSoft value and what the value has changed to in the E-doc. This happens after the document is routed.